I made a custom ABS Switch on my Yamaha Ténéré 700, which allows the disabling or enabling of the ABS, without the ABS re-enabling when the side stand, kill-switch or contact is used.
In the video I show the method I used. It is pretty straightforward. Please keep in mind that this is at your own risk. The wire I rerouted is 12v 20A, which is quite high.

The products I used:
- 2.5mm2 cables (link)
- 12v 20A switch (link)
- Female flat cable shoes for the switch (link)
- Cable shoes for the cables at the fuse box (link)
- Heat shrink tubing (link)
- Liquid tape (link)
This is not affiliate marketing. We don't make money when you buy using the links. Like what we did? Please consider contributing to our charity work.
Step by step process:
Please keep in mind that this is at your own risk.
- Remove the seat and side panels on one side
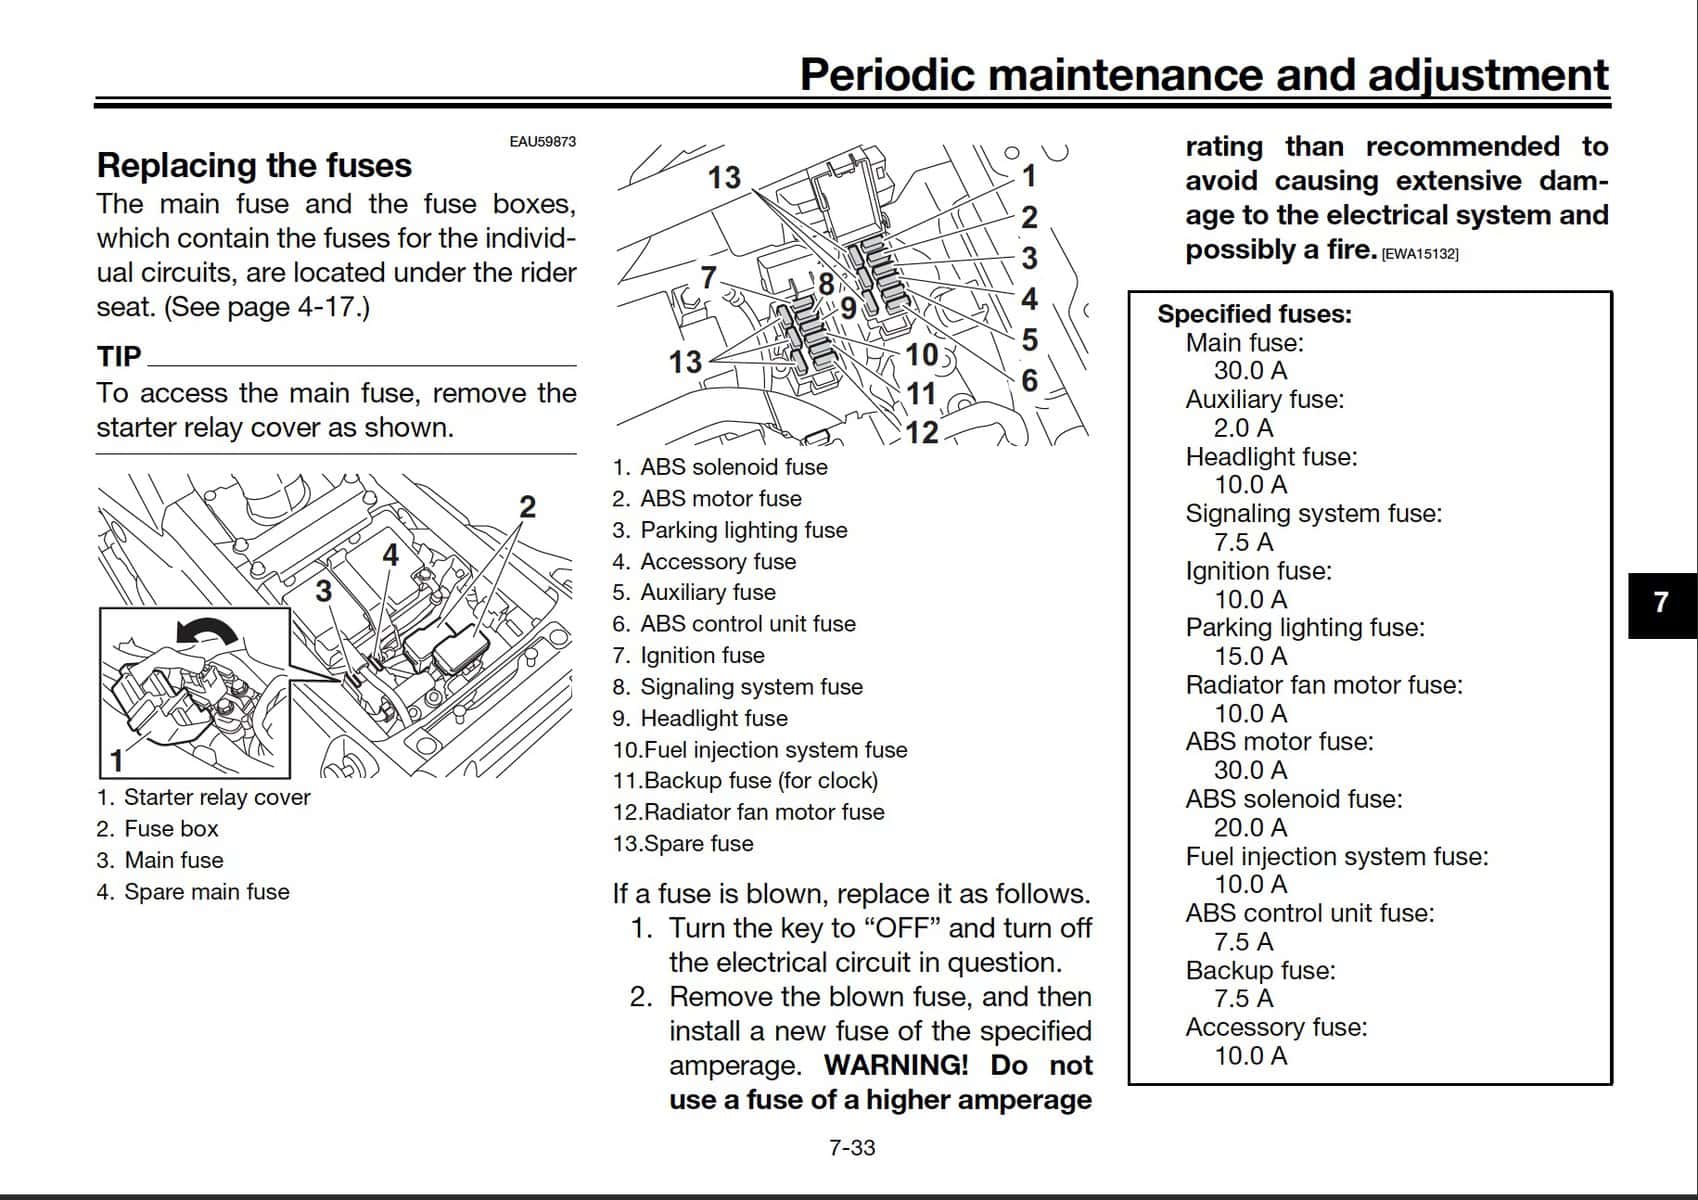
- Locate the fusebox under the seat
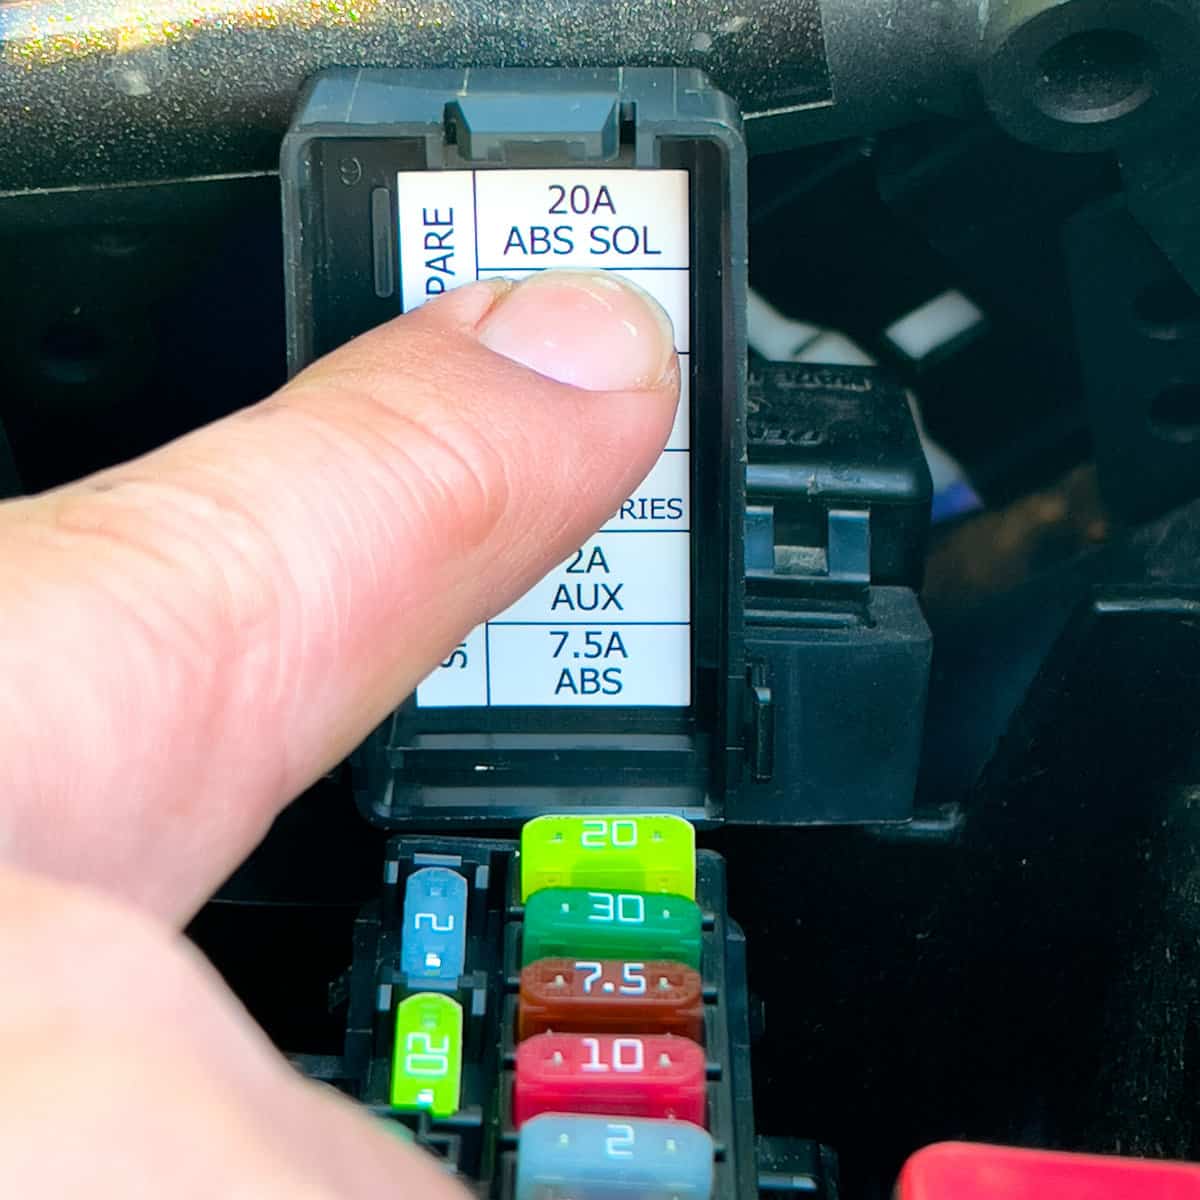
- Locate the the 'ABS Solenoid' fuse (which is the only fuse that you can use without getting errors on the board computer)
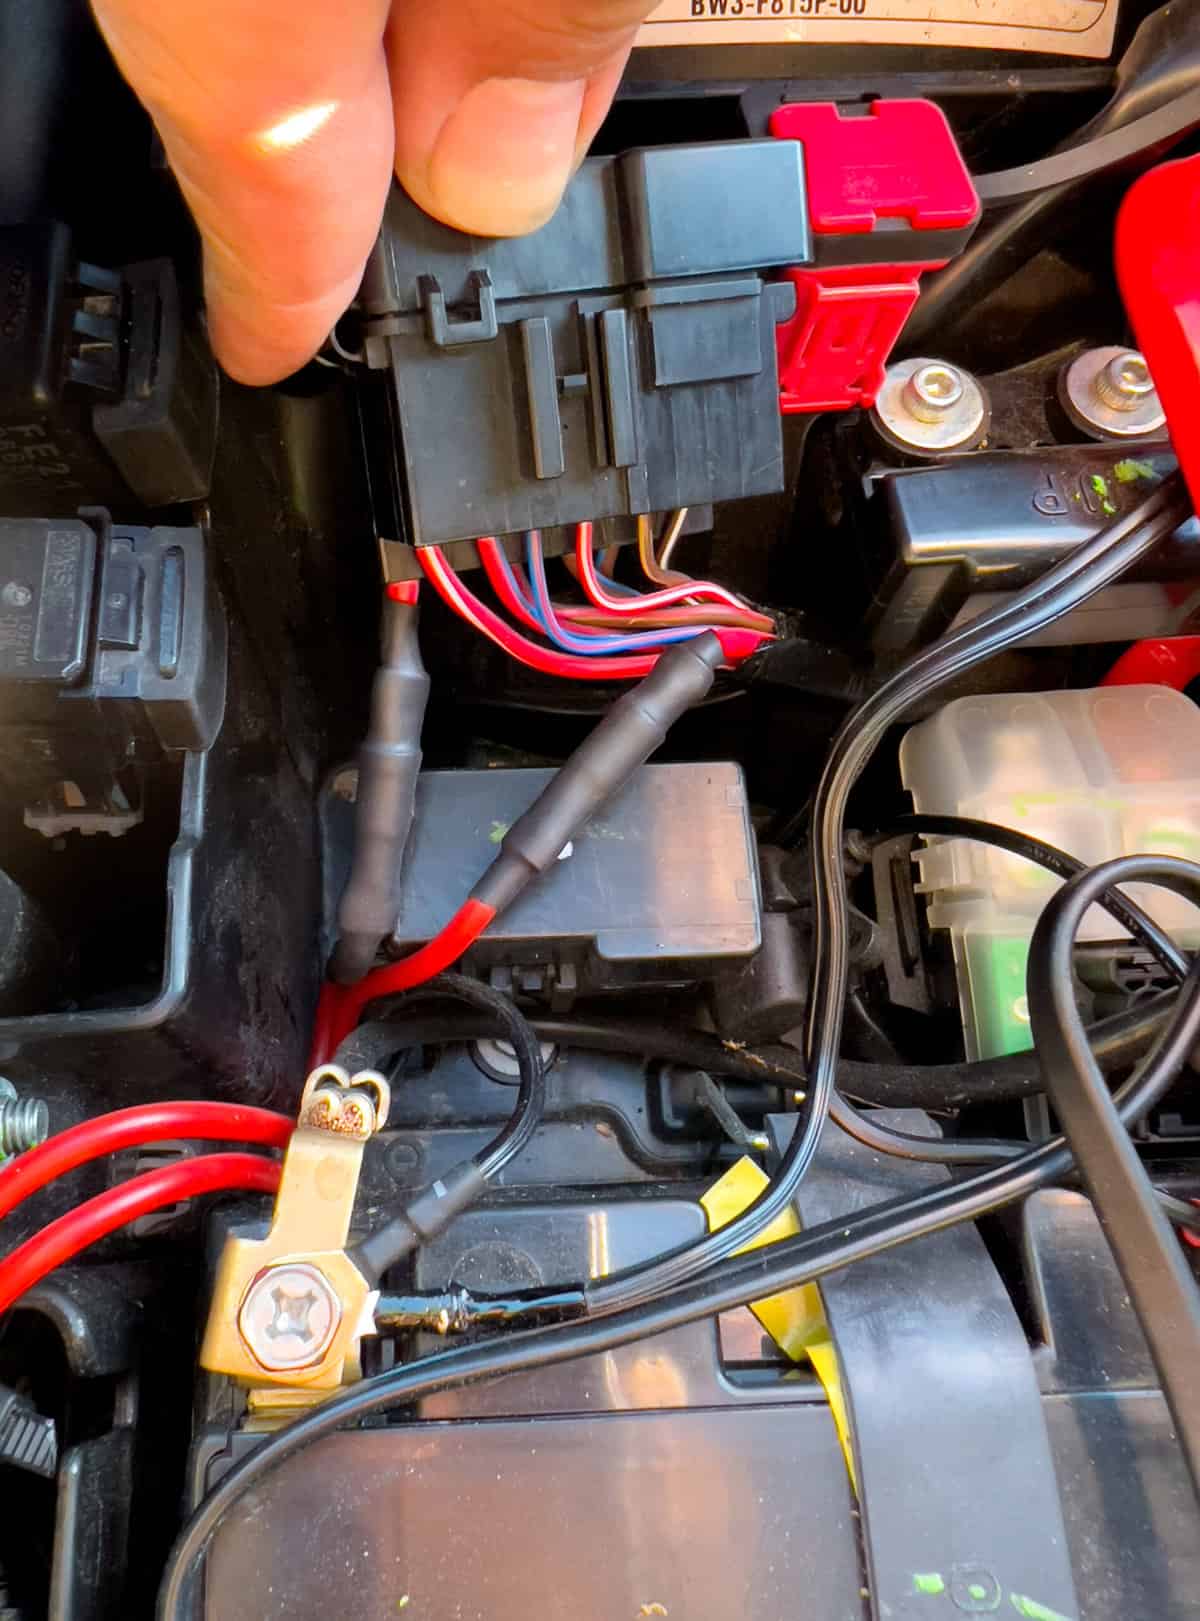
- Located the corresponding cables under the fuse box
- Make sure the bike is fully switched 'off'
- Cut one of the cables of the ABS Solenoid
- Connect the 2.5mm2 cables to the ABS cables with the cable shoes. Make sure you already have a heat shrinking tube in place, for when the test is successful.
- Wire the cable all the way to the handlebar, depending on where you want the switch.
- Connect the cable-ends on the handlebar to female flat cable shoes. Make sure you already have a heat shrinking tube in place, for when the test is successful.
- Mount the switch where you want it. Make sure it is mounted securely.
- Connect the cables to the switch. I did not use the grounding plug on the switch, if you want to, make sure to wire an extra cable.
- Make sure all the connections are strong and secure and set the switch to 'on'.
- Start the bike for a test round. The ABS light is supposed to be on, but after a very small ride, it should switch off like normal.
- If this works, flip the ABS switch to test its function. The ABS light should come on. If so: test successful. If not: check all the connection and check that the switch is set to the correct position.
- Fix the switch and the cables securely in place. Use the heat shrinking tube to cover all connections. Finally use the liquid tape the cover the connections of the switch. I used over 10 layers of liquid tape.
- Enjoy your new mod and ride safe!


